How to setup your shot
How to setup your shot
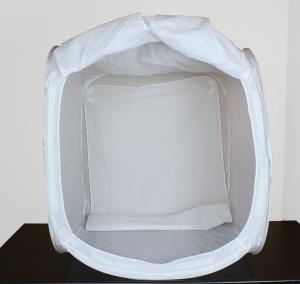
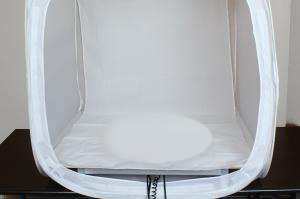
Step 1: Setup Your Shooting Environment
In this demo we will be using a simple, commercially-available photography tent. These tents are fabric enclosures that help to control glare, reflections, and create softer and more consistent lighting. They are rather inexpensive and produce good results without a lot of setup or fussing with lighting. In the back of the tent we can see the drop curtain used to create the infinite background. This gives us a smooth and even background in our images.
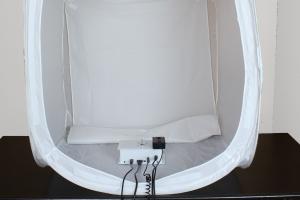
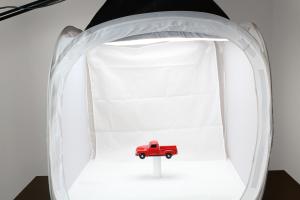
Step 2: Placing the Zcapture System
Here we have placed the Zcapture system inside the tent. With the system placed in the center of the tent, connect the power, shutter control, system control and usb cable if needed and allow them to drape out of the front of the tent. TIP: Make sure the Zcapture system is level so you get a constant shot and your product doesn't wobble.
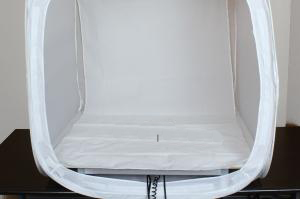
Step 3: Setting the Backdrop
With the Zcapture system in place you have a couple options. You can simply drape the backdrop over the system. The best result will be gained by using a piece of foam board the size of the tent with a hole in the middle of it for the motor’s drive shaft. This will reduce shadows and improve lighting evenness.
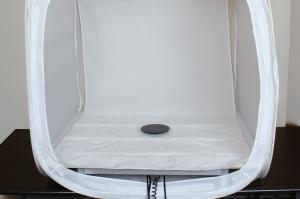
Step 4: Adding The Mounting Wheel
Next we will add the mounting wheel. Simply place the peg in the hole and tighten the screw. There’s no real rocket science involved. TIPS: Do not let the bottom of the disk rest on the foam board base. This will cause friction and possibly make the system perform inaccurately. Also make sure the wheel is not mounted too high. This can create stability problems or harder drop shadows around the edge of the paper wheel.
Step 5: Blending The background
To blend the background evenly and create the best possible lighting, we recommend using a large paper disk very close to the same color as the background. This helps with lighting, shadows and proper depth of field on your cameras settings will totally disappear into the background and create the perfect background frame to frame. Simply attach the circle of paper to the mounting disk with some double sided tape or command strips.
Step 6: Lighting Your Shot
Normally when using a tent, a single top, down-facing light set close to the top is all that’s required. You may also choose to use two lights placed on the sides of the tent pointing inward. The choice for lighting completely depends on the item you are shooting. The end goal, regardless of setup, is to create even lighting across the subject and the backdrop of the tent. With proper exposure and F Stop you can compensate for any minor lighting issues.
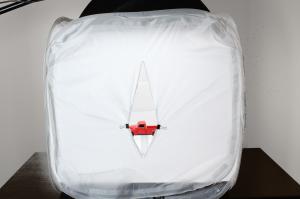
Step 7: Setup For Your Camera
Once your lighting is set up, you can start doing a few test shots with your camera. You may want to fully enclose the product you are shooting (as seen in the picture to the left) to help reduce reflections from the room or camera body. In other cases you may want to use a zoom lenses and no tent at all, with a completely dark room and highly reflective items or mirrored surfaces. Once you have decided on your method, make sure to spend a few moments with some test shots to insure easy-to-no post processing.
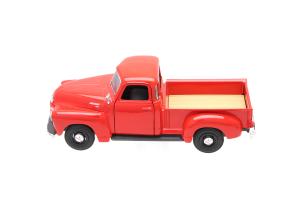
Step 8: Getting The Result You Want
This is a good example of a clean end result. In this shot we used a small length of white PVC pipe to lift the item up off the paper so there was no drop shadow. This image is directly from the camera and has had no post processing. The closer you get to perfect the less editing you will have to do later in your images. Fortunately the Zcapture software has a powerful suite of tools to help batch process all images with the same modifications if needed.